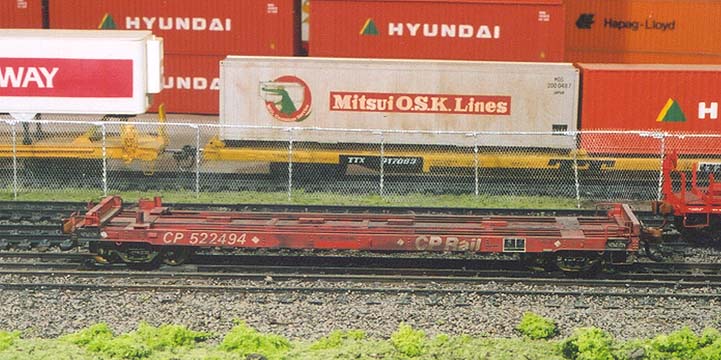
 Interested in building a model of one of these cars?
 Get a copy of the September 2001 Railroad Model Craftsman
as it contains my article on scratchbuilding these cars.


| Return to Home Page |
|
|
|
|
Interested in building a model of one of these cars? Get a copy of the September 2001 Railroad Model Craftsman as it contains my article on scratchbuilding these cars. |
|
| |
|
The start of the next project, a bit underway...
| |
| |
|
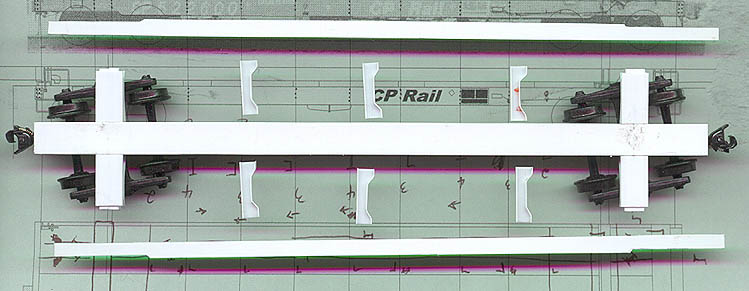
Now I have to add some cross members. So how do you construct these? You could do it the hard
way and glue the parts together free hand or you could use a jig. This jig is just a bunch of
bits of plastic glued together to have an S shaped gap in the center. This gap is the right size
to allow 1x3 strip styrene. Feed in 3 strips at one end, glue them together at the other end and
you end up with structual stock. Simple eh? The image above shows a cross section and two halves.
(The jigs don't always work so I end up re-building some) | |
| |
|
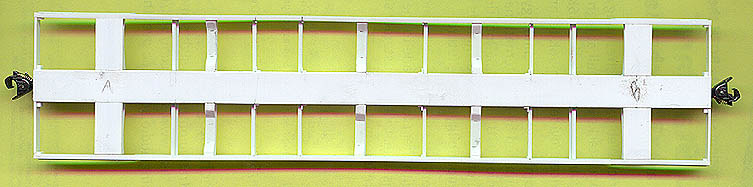
All the cross members are in place, with support brackets at their ends. Starting to look good.
There's no top deck on this intermodal flatcar so you'll be able to see right through it. All the weight is
in the center sill (lead). | |
| |
|
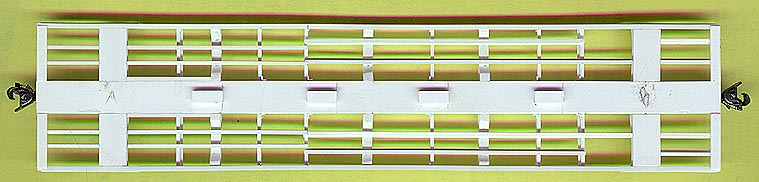
The long braces are in place as well as some container supports down the middle. From here on in it's
all details. | |
| |
| |
|
The details on the top of the deck have been added including deck plates and container bolsters / shoes.
The grab irons will be added last. Next to go on will be the air brake details. Oops, I forgot to
add the shoe stops. This car is set up to carry a 40' container. | |
| |
|
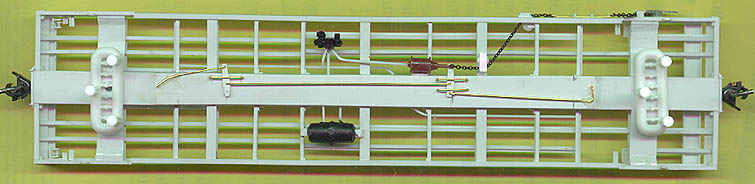
Brake gear is installed. Note the chain that goes from the hand brake to a rod along the side then
through the side along a pully then around another pulley and then to the brake cylinder. The brake levers
aren't realy visible from the top but were fun to put on. I had to terminate the air lines before they
went to the car ends as they get in the way of the trucks. Next up... rivets, grab irons then paint. | |
| |
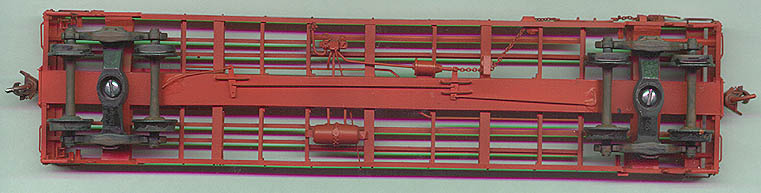
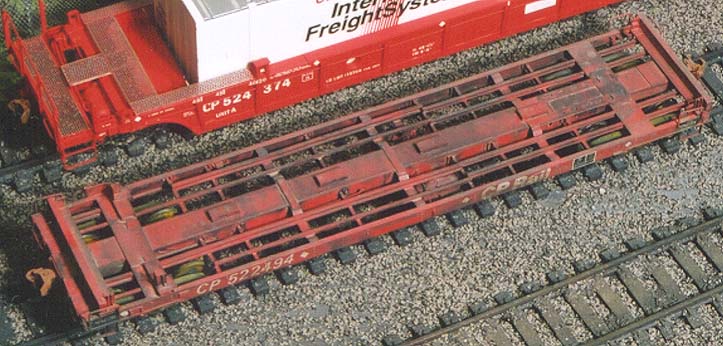
| brake side. The rivets were shaved off an old tyco boxcar and glued onto this model. On the prototype there are around 250 rivets, I only added the most obvious ones ie, those on the sides and ends. | |
| |
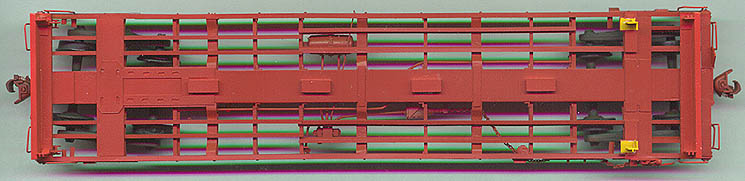
| bottom | |
| |
| top.The most dramatic compromise I had to make was the center sill. The model has a sill that is too wide and too deep (between the trucks). I did this for two reasons, 1.-Weight, I needed somewhere to put weight, 2.-couplers, a scale sill (around 1'x1' cross dimenstions) is not wide enough to accomodate a Kadee coupler. So I made the sill just wide enough to hold a Kadee (this also meant more room for weight. Final weight 54 grams.June 30 | |
|
|
|
|